Mission Possible - Shipping without a hard case
Preparing, packaging, and shipping an instrument without a hard case!
During the 10 years of posting on this blog I have written three (3) detailed articles regarding preparing, packing, and securely shipping a bouzouki instrument.
All of the articles refer though to instructions of how to securely and safely ship a musical instruments inside a hard case.
Here is an article I created for the "impossible mission' shipping securely your instrument without a hard case. l also created instructions regarding packing and securely shipping an old mandolin without a hard case! Both methods tested successfully in real-life scenarios
Materials to be used:
1.
Exterior cardboard Box 38 x 13.5 x 16.5
2.
Interior reinforcement heavy duty cardboard boxes
16 x 12 x 12
3.
Small bubble cushion wrap
4.
Large bubble cushion wrap
5.
3M Heavy Duty packing scotch tape
6.
Printed Fragile labels
7.
Foam panels
Total packing material cost $
45.00
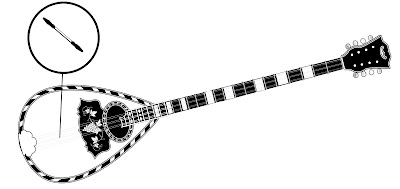
Steps of preparing the instrument
1. After inspecting the instrument, de-tune all the strings, and very carefully, remove
the bridge from the soundboard. Do not leave the bridge sideways on top of the
sound board since the small movement in transit can lightly injure the luster
and the finish of the bouzouki’s top. (I have experience on this)
***Attention:
By de-tuning all the strings
together at the same time you risk to damage your instrument's sound board and
neck. Instead de-tune them little by little and one by one starting from the
outer strings, going to the inside ones. First de-tune the lowest D (RE- kantini), after the thicker D on top (RE-mourgana). Following the
second lowest D (Re-kantini), and
then the thinner top D (RE-under the
mourgana). At the end the remaining middle pair of strings, the lower A and finally the upper A (LA -for a trichordo set up) Repeat
until all strings are loose enough so you can easily remove the bridge
2. Use a small size bubble wrap to carefully wrap securely the bridge, then place
it inside the soft case / bag pocket (if applicable). If it doesn't fit inside the pocket,
place it inside the soft case (Take
photo for insurance purposes)
3. Tune back
slightly the strings so they are
not loose on top of the fretboard and the sound board and they are tight enough
to create straight lines and be able to hold the smaller bridge (nut) in place. Use cautious; Do not
tune back the strings excessively. (Take photo for insurance purposes)
4. .
Wrap the
instrument very carefully all
around with the bubble cushion wrap and secure it with the shipping tape.Use double sheet of bubble cushion
wrap, at the area around the soundboard, the bowl, the connection of the neck
to the bowl, and at the head stock. (Take photo for insurance purposes)
Steps of preparing the shipping box.
In our case we will use an exterior 38 x 13.5
x 16.5 white cardboard box
The out of -the
shelf cardboard boxes available at Home Depot have dimensions which do not fit
or will be too large for our bouzouki instrument. So, we will need to
improvise a strong and rigid set up.
1. Take
two of the heavy duty cardboard boxes 16 x 12 x 12 and close them with packing tape
2. With
a razor knife cut out the square sides of the boxes. Your goal is to create a square pipe with the end-sides open and length of
16 inches each. These are your interior top and bottom reinforcing boxes, and where
your instrument will be placed. .
3. Use the 3rd 16 x 12 x 12 box to reinforce the
remaining empty sides. Secure the inner boxes inside the exterior box
(Take photo for insurance purposes)
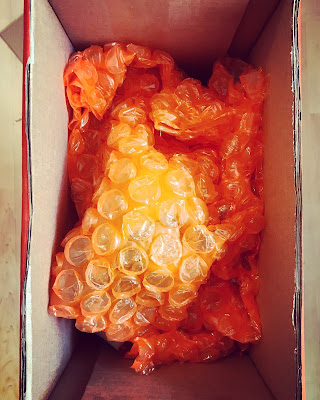
4. Place the instrument inside the boxes and fill up the
empty spaces with the thick large bubble wrap. Use enough bubble
wrap to stabilize and protect the instrument from all sides and directions. Do
not be "cheap" in materials in this step. Use most of the bubble role
and the packing tape to secure properly your instrument. (Take photo for insurance purposes)
5. Place foam panels or
any other rectangular panel made by hard material, and use them as beams to
reinforce the inner space of the outer box ,so it can stay rigid even if someone
drops it or sit on it. Place the panels vertically and horizontally to
stabilize both dimensions of the box.
6. Add
extra cushion at the bottom and at the top of the box where the bowl and the
head-stock of the instrument rests (Take
photo for insurance purposes)
7. Do
not forget to place inside the box also the
plastic case / bag (if applicable) and the wrapped bridge
from step 2 of the “Preparing the Instrument” section. (Take photo for insurance purposes)
8. Print Fragile labels
and stick them all around the exterior box. (Take photo for insurance purposes)
9. Ship
it with tracking
number and insurance (Take photo for insurance purposes)
Shipping an old mandolin without a hard case
Shipping an old mandolin without a hard case
Materials to be used:
1. Two (2) heavy duty cardboard boxes 16 x 12 x 12
3. Small bubble cushion wrap
4. Large bubble cushion wrap
5. 3M Heavy Duty packing scotch tape
6. Printed Fragile labels
7. Brown heavy duty craft paper
Total packing material cost $ 20.00
1. You will need to open (unfold) at first the two heavy duty 16 x 12 x 12 cardboard boxes by easily peeling the inside part of where the sides of the boxes connect (glued)


1. You will need to open (unfold) at first the two heavy duty 16 x 12 x 12 cardboard boxes by easily peeling the inside part of where the sides of the boxes connect (glued)
2. Keep from each box the 16 inch and 12 inch panels (green highlighted)
3. Use heavy duty packing tape to attach (secure together) the side smaller panels of each box
4. You have created the top and bottom longer sides of your shipping box
5. Follow the same instructions by removing the bridge from the mandolin, and securely wrap it with bubble wrap
6. Wrap your mandolin very carefully all around with the bubble cushion wrap and secure it with the shipping tape.Use double sheet of bubble cushion wrap, at the area around the soundboard, the bowl, the connection of the neck to the bowl, and at the head stock. (Take photo for insurance purposes)
7. Stitch (with heavy duty packing tape) the box longer sides from step #4.You should now have a rectangular card-box pipe with height approx of 28 inches.
8. Cut a piece from the remaining scrap parts of the boxes and create the base of your box.
9. Place your mandolin inside the box. (Take photo for insurance purposes)
10. Fill up the empty space by using alternately large bubble cushion wrap and brown heavy duty craft paper .(Take photo for insurance purposes)
11. Cut another piece from the remaining scrap parts of the boxes and create the top of your box. Seal the box, add fragile signs and ship it with tracking number and insurance (Take photo for insurance purposes)

Μπράβο Σπύρο εξαιρετικά κατατοπιστικό το άρθρο σου!!
ReplyDeleteNice post, very useful blogs with very useful information, thank you for sharing this post packing materials for shipping.
ReplyDelete